Photoshop
Creating Height Maps for ReBumpX
This tutorial demonstrates how to make a height map in Photoshop for use in ReBumpX. ReBumpX uses BMP files to generate SEG files that can then be converted to models in A:M. These models serve as a good starting place for creating believable landscapes.
To create height maps:
- Select File > New to create a new image.
The New image menu appears.
- Set Width and Height to 1 inch each.
- Set Resolution to 300 pixels/inch.
- Set Mode to Grayscale.
- Click OK when your finished to create the new image.
- Make sure the foreground color is set to black (RGB 0,0,0), and the background color is set to white (RGB 255,255,255).
- Select Filter > Render > Difference Clouds.
Photoshop creates a cloudy image. This image is the basis for the landscape you make in A:M.
- Press CTRL + f on your keyboard until a pattern emerges that
you like.
I personally like patterns that have sharp contrasts between black and white.
- Select the air brush tool.

Air Brush Tool - Make sure the air brush options are visible. Select Window
> Show Options if it's not.
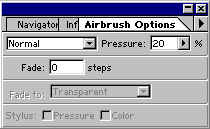
Air Brush Options - In Airbrush Options, set Pressure to around 25 percent.
- Use the airbrush to "fill in" areas where you want to smooth
the terrain and create flat areas.
Change the foreground color as needed. You want to smooth out the image a bit so that you do not create a model that is a collection of sharp high and low points.
NoteReBumpX uses black as the 0 height value and white as the highest height value. Shades of gray create heights between the highest and lowest point. The darker (closer to black) the gray is the lower the height value for that color. The lighter (closer to white) the gray is the higher the height value for the color. When you're filling in areas, don't make the terrain a solid color. Allow some of the original difference clouds texture to show through. This leaves little bumps along the model making it look more like actual terrain. - Select File > Save a Copy to save the map when you're done. Name it whatever you want and save the image as a BMP file.
You can experiment with different images to see what ReBumpX does to them. My favorite is to use X-rays. Some interesting models show up!!!
Contact Me:
terms of useThis site and all its content are Copyright© 2000-2004 Sean Hower
04-Jan-2005
Guest contributions copyright by their authors
Free Javascripts provided
by The Javascript Source Last updated:


